
Vet Practice · Vet Practice Scheduling
Set up appointment types and working hours
In Vivetra: Vet Practice Scheduling › Scheduling Settings
Scheduling Settings is where your practice decides what can be booked: the kinds of appointment and how long each takes, the rooms and equipment, when each vet works, and when a client is asked for a deposit after missed visits. Everything here feeds the booking form (see Book an appointment).
Only practice managers see this page. Open it from Vet Practice Scheduling › Scheduling Settings in the menu.
There's no delete on this page. To stop using something, set it to Retired instead, so past appointments keep their history.
Appointment types
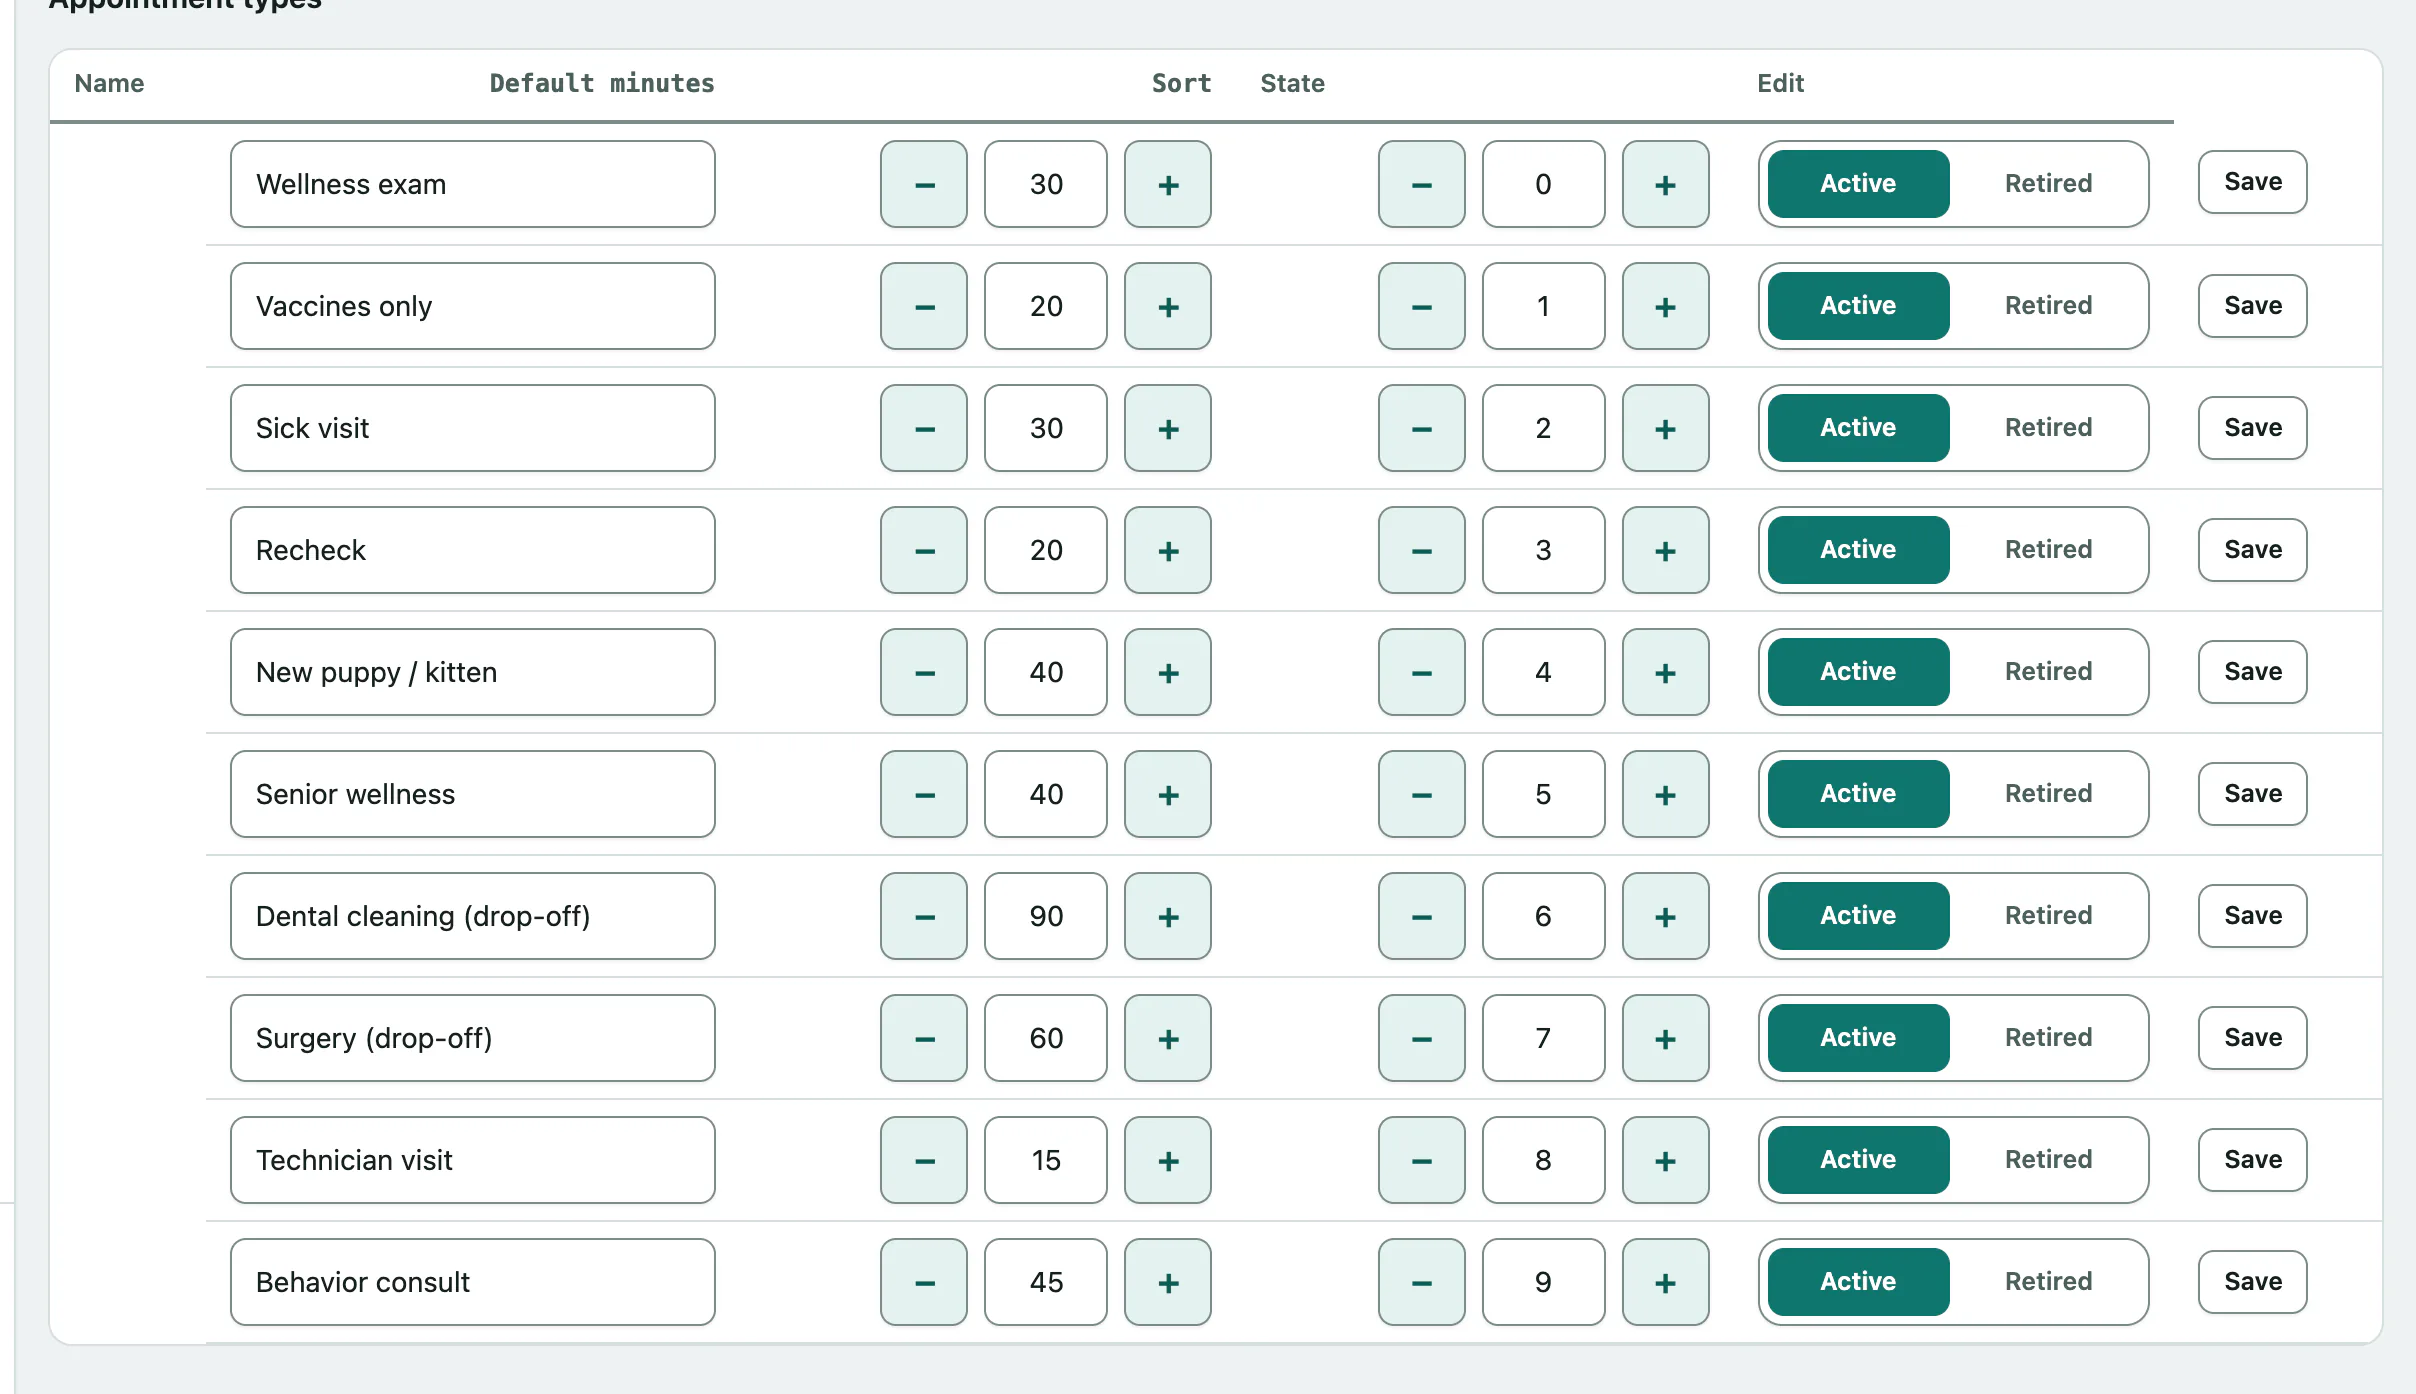
An appointment type gives the booking form a default length, such as "Wellness exam, 30 minutes".
To add one, under Add an appointment type:
- Enter a Name.
- Enter the Default minutes, from 1 to 1440.
- Optionally set a Sort order. Lower numbers come first in the booking form's list.
- Select Add appointment type.
To change one, edit it in the Appointment types table, or set its State to Retired, and select Save on that row. Each row saves on its own.
Rooms and equipment
Schedulable resources are the rooms and shared equipment a booking can reserve, such as "Exam Room 1" or "Ultrasound". Vivetra warns you when two appointments want the same one at the same time.
- Under Add a resource, enter a Name.
- Optionally enter a Type (optional — e.g. room, equipment).
- Select Add resource.
Edit or retire a resource in its row and select Save, the same as appointment types.
Provider working hours
Provider working hours record which days and times each vet is in. Each row is one weekly band, such as "Tuesdays, 09:00 to 17:00". Times are your practice's own clock, so 9 to 5 stays 9 to 5 when the clocks change.
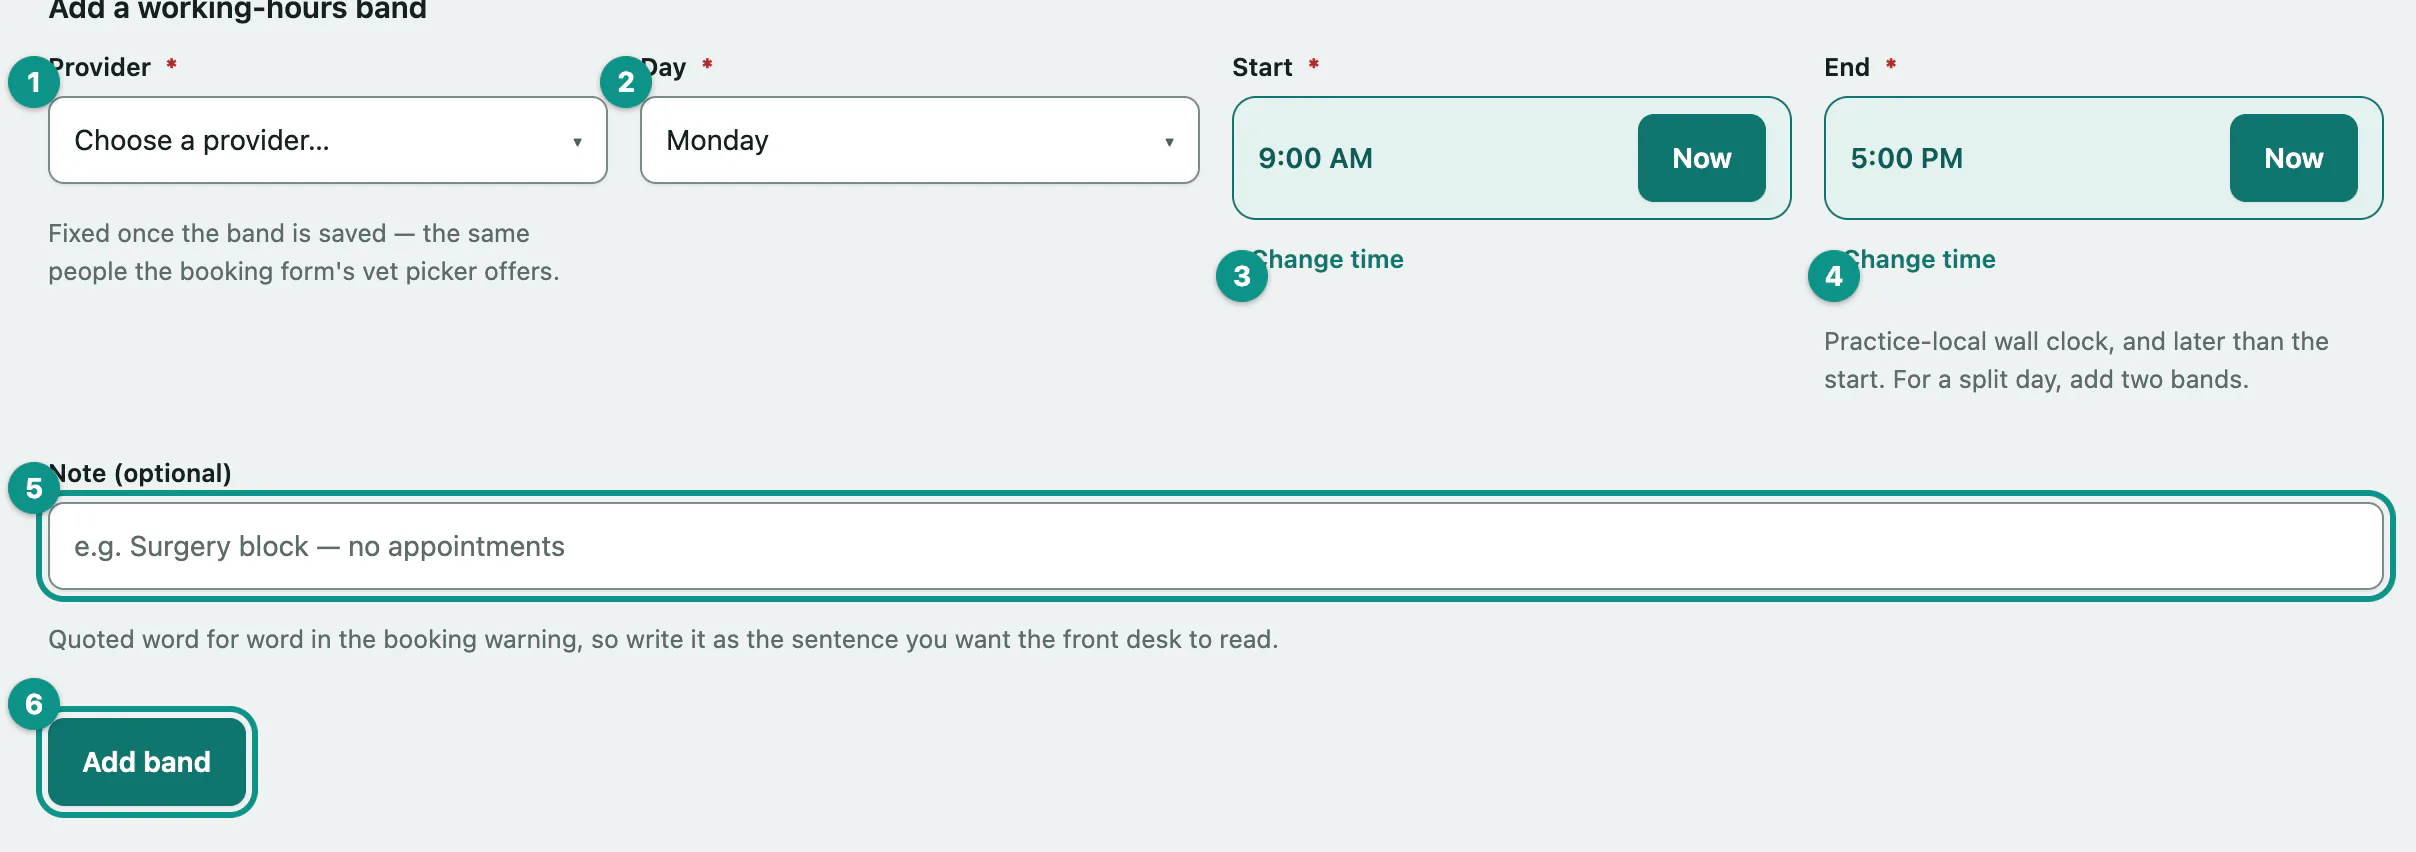
- Under Add a working-hours band, choose the Provider.
- Choose the Day.
- Set the Start time.
- Set the End time. It must be later than the start.
- Optionally add a Note (optional). It's shown word for word in the booking warning, so write it as you'd want the front desk to read it, for example "Surgery block — no appointments".
- Select Add band.
For a split day, add two bands, for example 09:00 to 12:00 and 14:00 to 18:00. You can't move a band to a different vet: add a new band for them and retire the old one. Retired bands are kept, so a seasonal rota doesn't have to be typed in again.
No-show policy
The no-show policy decides when the front desk sees Prepayment suggested: for a client who keeps missing appointments. The count is worked out from the appointments themselves each time, so changing the policy never changes anyone's history.
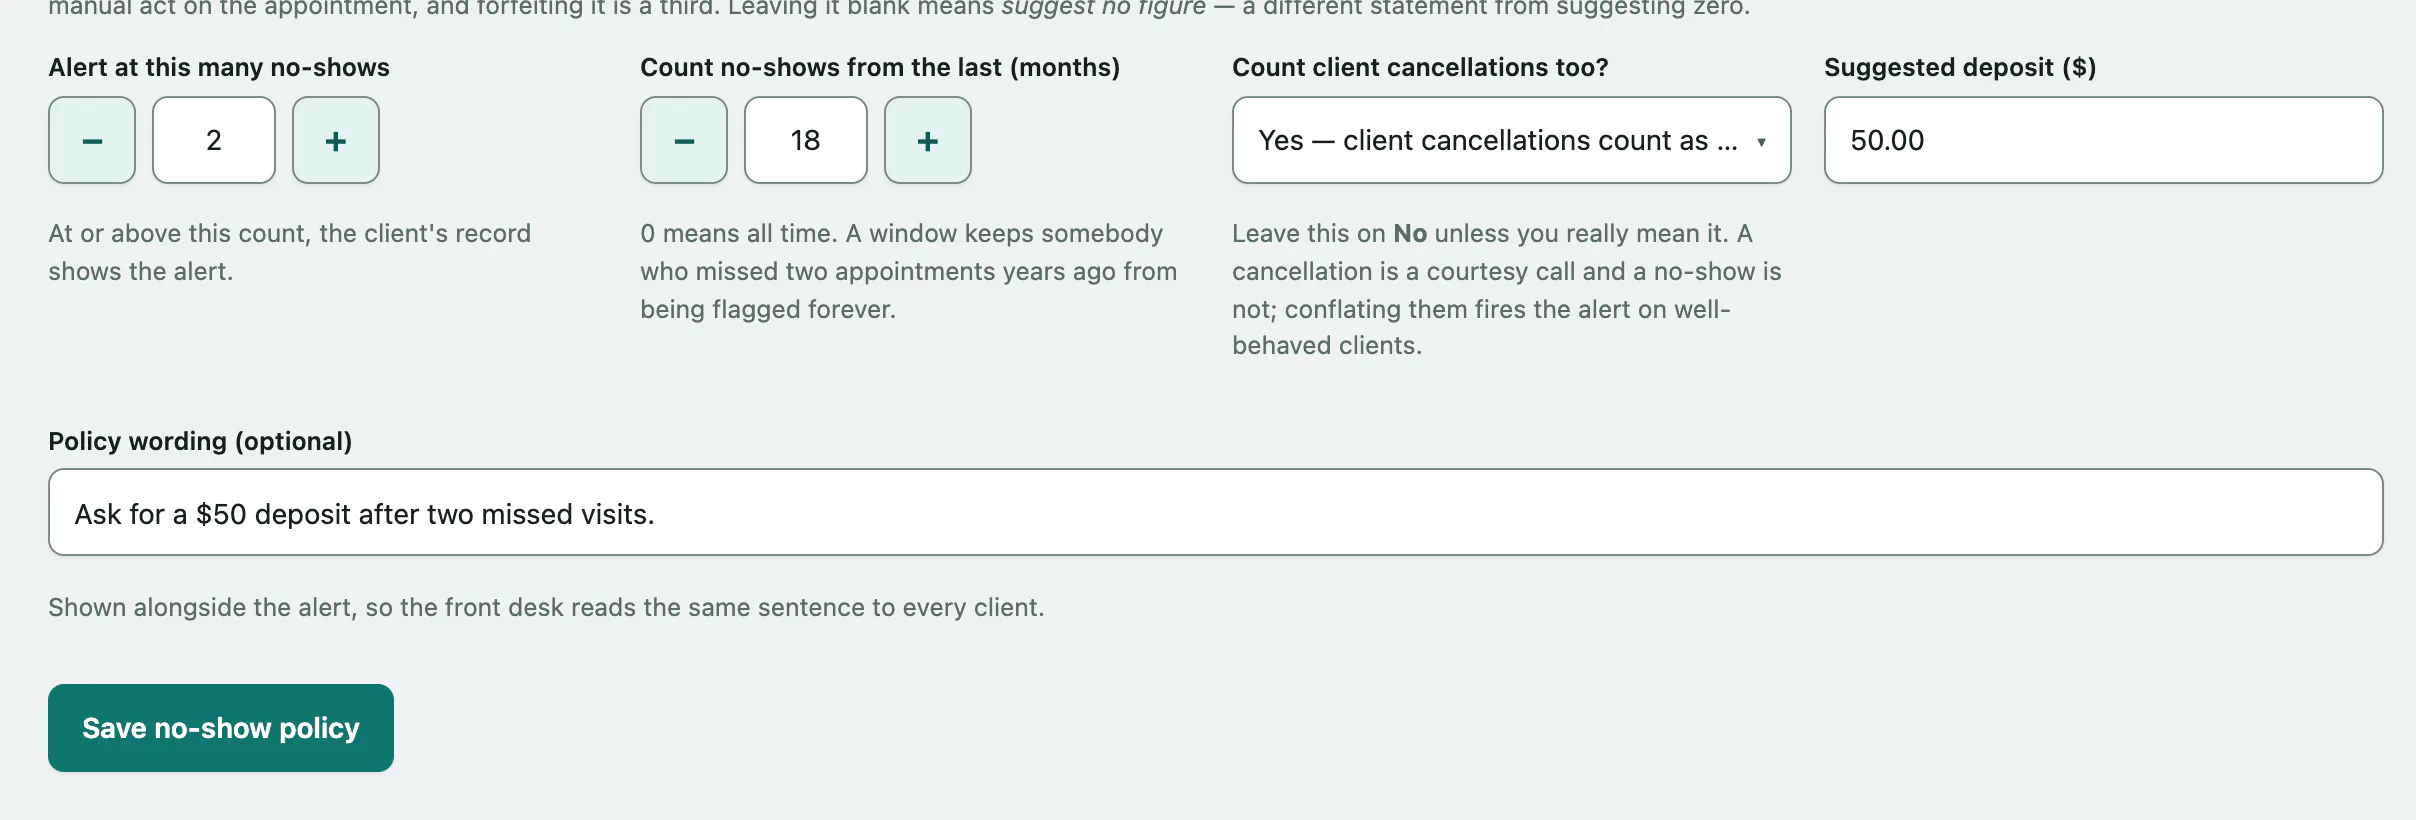
- In Alert at this many no-shows, enter the number of missed appointments that triggers the alert.
- In Count no-shows from the last (months), enter how far back to count. 0 means all time.
- In Count client cancellations too?, choose No — no-shows only unless you really want cancellations to count. A client who rings to cancel isn't the same as one who doesn't turn up.
- Optionally enter a Suggested deposit. Leave it blank to suggest no amount.
- Optionally enter the Policy wording (optional) shown with the alert, so everyone gives clients the same explanation.
- Select Save no-show policy.
Until you save a policy, the page says No no-show policy has been configured yet. and Vivetra uses the values shown in the boxes: alert at 2 no-shows, counted over 24 months, no-shows only.