
Shelter
Record an intake
In Vivetra: Shelter › Intakes
On this page
Every animal that comes into your care gets an intake: one record for this stay, from arrival to outcome. You record it on the Intakes screen, then keep it up to date on the intake's own page.
Find an intake
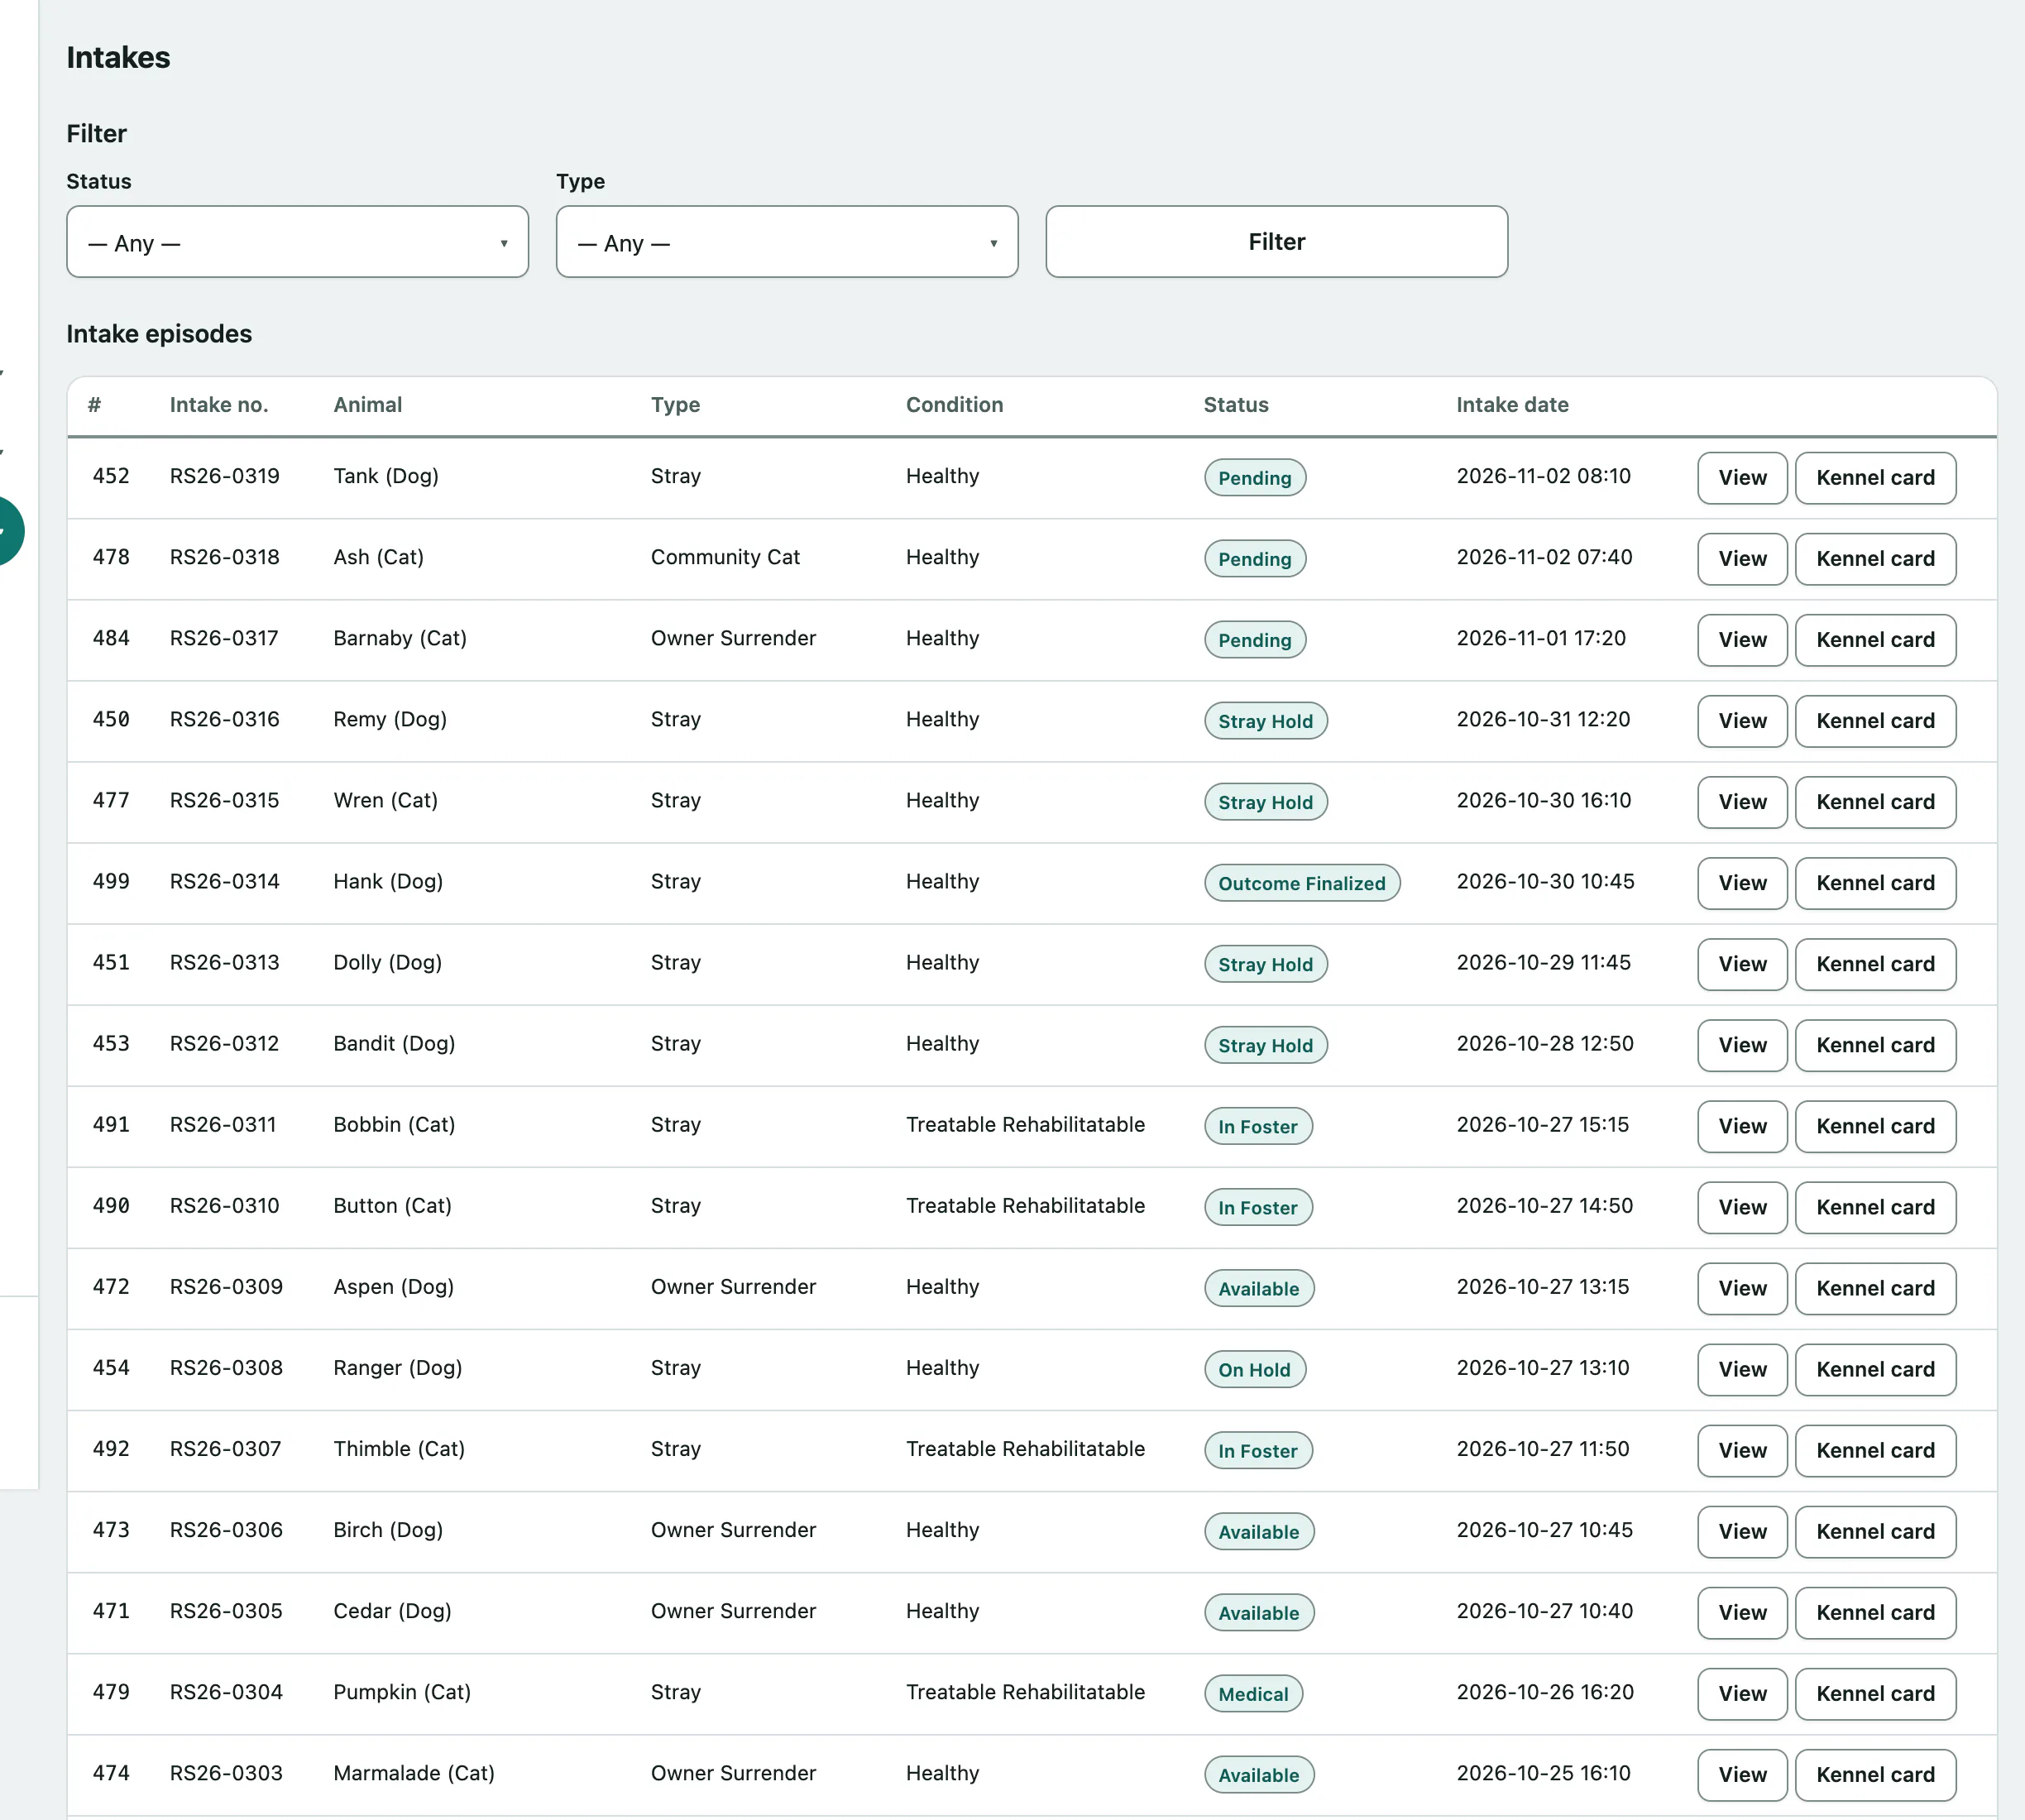
- Select Intakes in the Shelter menu. The Intake episodes table lists every intake with its number, animal, type, condition, status and date.
- To narrow the list, choose a Status or Type under Filter.
- Select Filter. Select Clear to see everything again.
- Select View on a row to open that intake.
Record a new intake
The animal must already have a patient record. If it doesn't, add it under Records › Patients first. (Accepting a surrender request creates the patient for you; see Manage surrender requests.)
- On the Intakes screen, under Record a new intake, choose the Animal (patient). You can type to search the list.
- Choose the Intake type, for example Owner Surrender, Stray, Transfer In or Community Cat.
- Choose the Asilomar condition: Healthy, Treatable Rehabilitatable, Treatable Manageable, Unhealthy Untreatable or Unknown.
- Choose a Status, such as Pending, Stray Hold or Available.
- Fill in any of the optional sections below that apply, then select Create intake. The new intake's page opens.
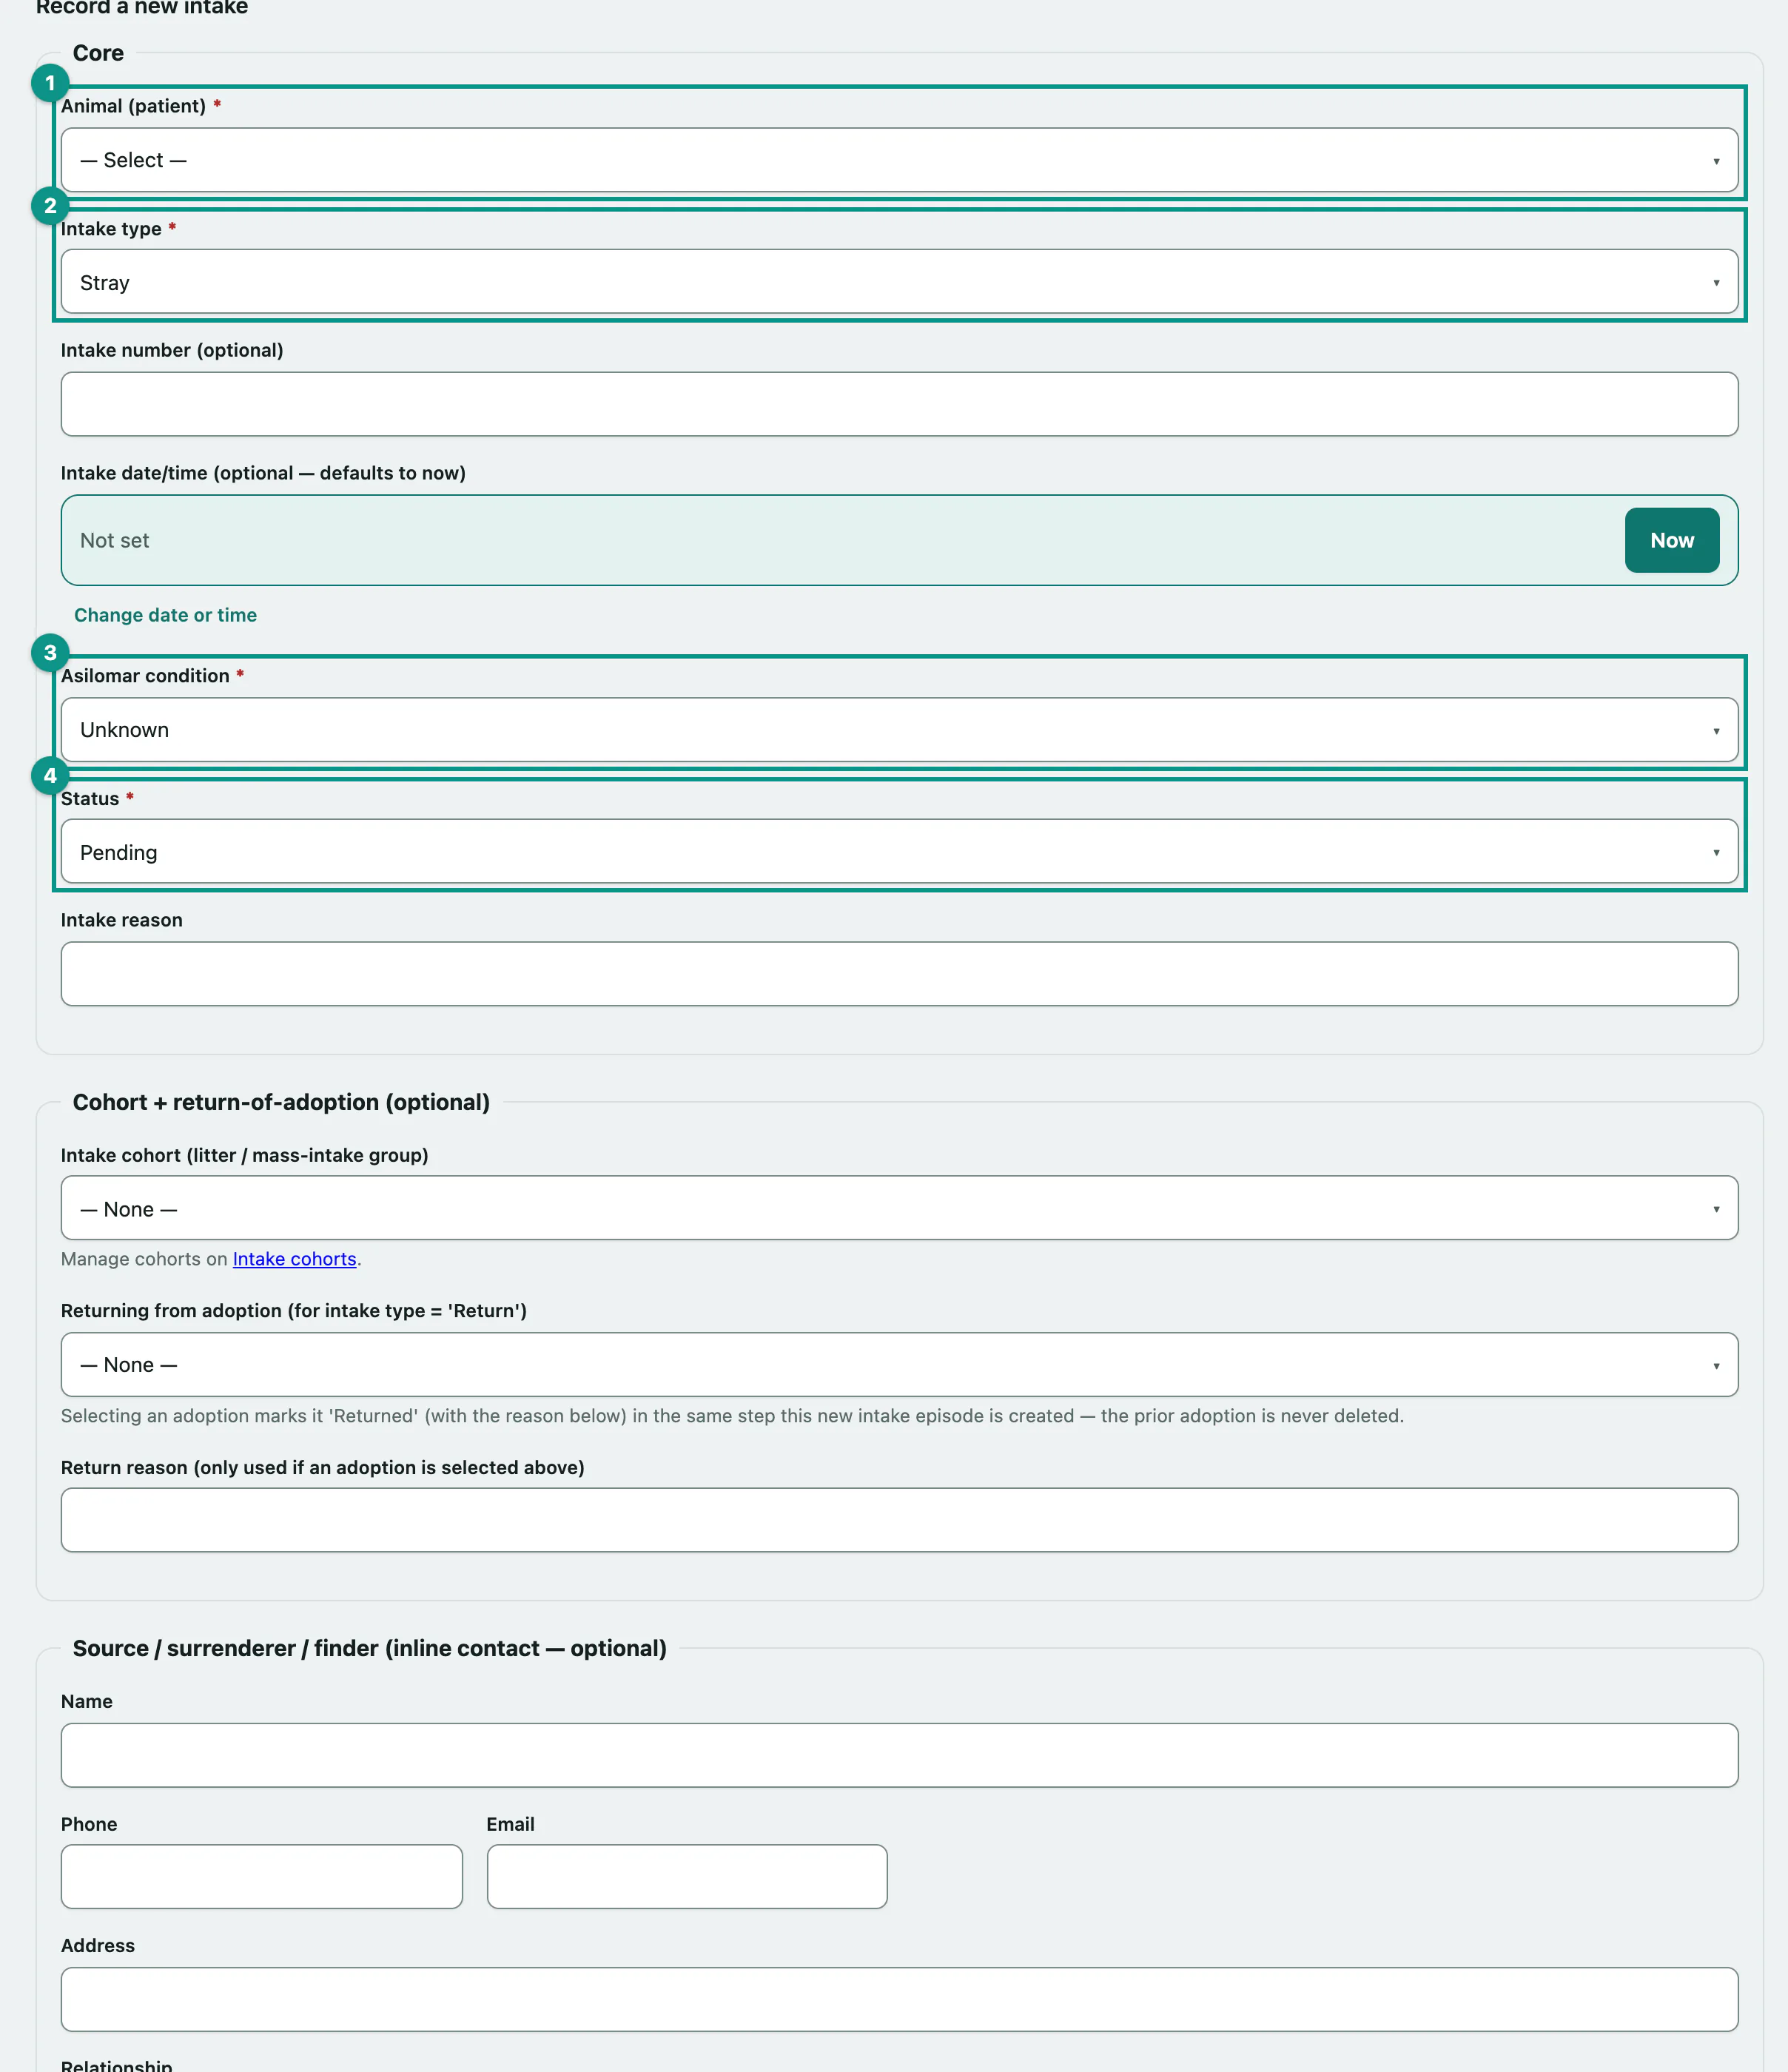
If you leave Intake date/time (optional — defaults to now) blank, the intake is dated now. Intake number (optional) is for your own numbering. Vivetra records you as the person who took the animal in.
The optional sections
Fill in only what applies to this animal. Anything you leave blank stays blank.
| Section | Use it for |
|---|---|
| Cohort + return-of-adoption (optional) | Adding the animal to a litter or group (Intake cohort (litter / mass-intake group)), or linking a returned animal to its earlier adoption. |
| Source / surrenderer / finder (inline contact — optional) | The person who brought the animal in or found it, their Relationship, the Found location (stray), a Stray-hold until date and the Jurisdiction. |
| TNR / community-cat (optional — fill for a community cat intake) | Ear-tip status, Colony location and the colony caretaker's contact details. |
| ACO field-intake provenance (optional — fill for an officer field pickup) | The responding officer (by name, or picked from your own staff), the Complaint / dispatch reference and the Pickup location. |
| Notes | Anything else. |
An animal returned after adoption
Choose Return as the intake type, then pick the adoption under Returning from adoption (for intake type = 'Return') and give a Return reason (only used if an adoption is selected above). Only finalized adoptions of this same animal are accepted. Creating the intake marks that adoption Returned; the adoption record itself is kept.
The intake page
The intake page shows the Episode details and, when they apply, the source, TNR, officer and stray-reclaim sections. Further down you'll see this animal's holds, foster placements, recent behavior observations, public listing and outcome. Links at the top go to the Patient chart, the animal's Cohort, Behavior assessment, Behavior observations and Neonatal care.
A red PATIENT CAUTION / SAFETY FLAG banner appears when the patient record has a caution flag.
Move the animal to another site
If your shelter has more than one site, keep Current facility up to date as the animal moves. This doesn't start a new intake, and it feeds the census report (Check census and length of stay).
- Under Move to a current facility, choose the Current facility.
- Select Save facility.
Record a stray's microchip and owner check
Stray intakes have a Stray-reclaim owner identification section for the chip scan, the registry lookup and the date you told the owner.
- Enter Chip scanned at and choose the Registry lookup result: — Not yet checked —, No owner on file or HIT — owner on file.
- If the registry found an owner, enter their people record number under Identified owner — core people id (the reclaim owner, NOT the finder; leave blank if unknown).
- Enter Owner notified at (legally load-bearing — the stray-hold-clock trigger).
- Select Save reclaim identification.
These details can be changed until the intake has an outcome. After that they are locked.
Attach a photo or document
Attach photos, a signed surrender form, a stray-hold document or an adoption contract scan to this intake.
- Under Upload an attachment, choose a Category.
- Choose the File and add a Caption if you like.
- Select Upload attachment.
Anyone can see the list of attachments, but View and Download only appear for staff allowed to view any animal's chart.
Print a kennel card
A kennel card shows the animal's details, housing, active holds and adoption listing copy, ready to clip to the kennel. It's built fresh from the record each time you open it.
- On the Intakes screen, select Kennel card on the animal's row.
- Choose a size: Full page, Half page or Cage strip.
- Select Print this card.
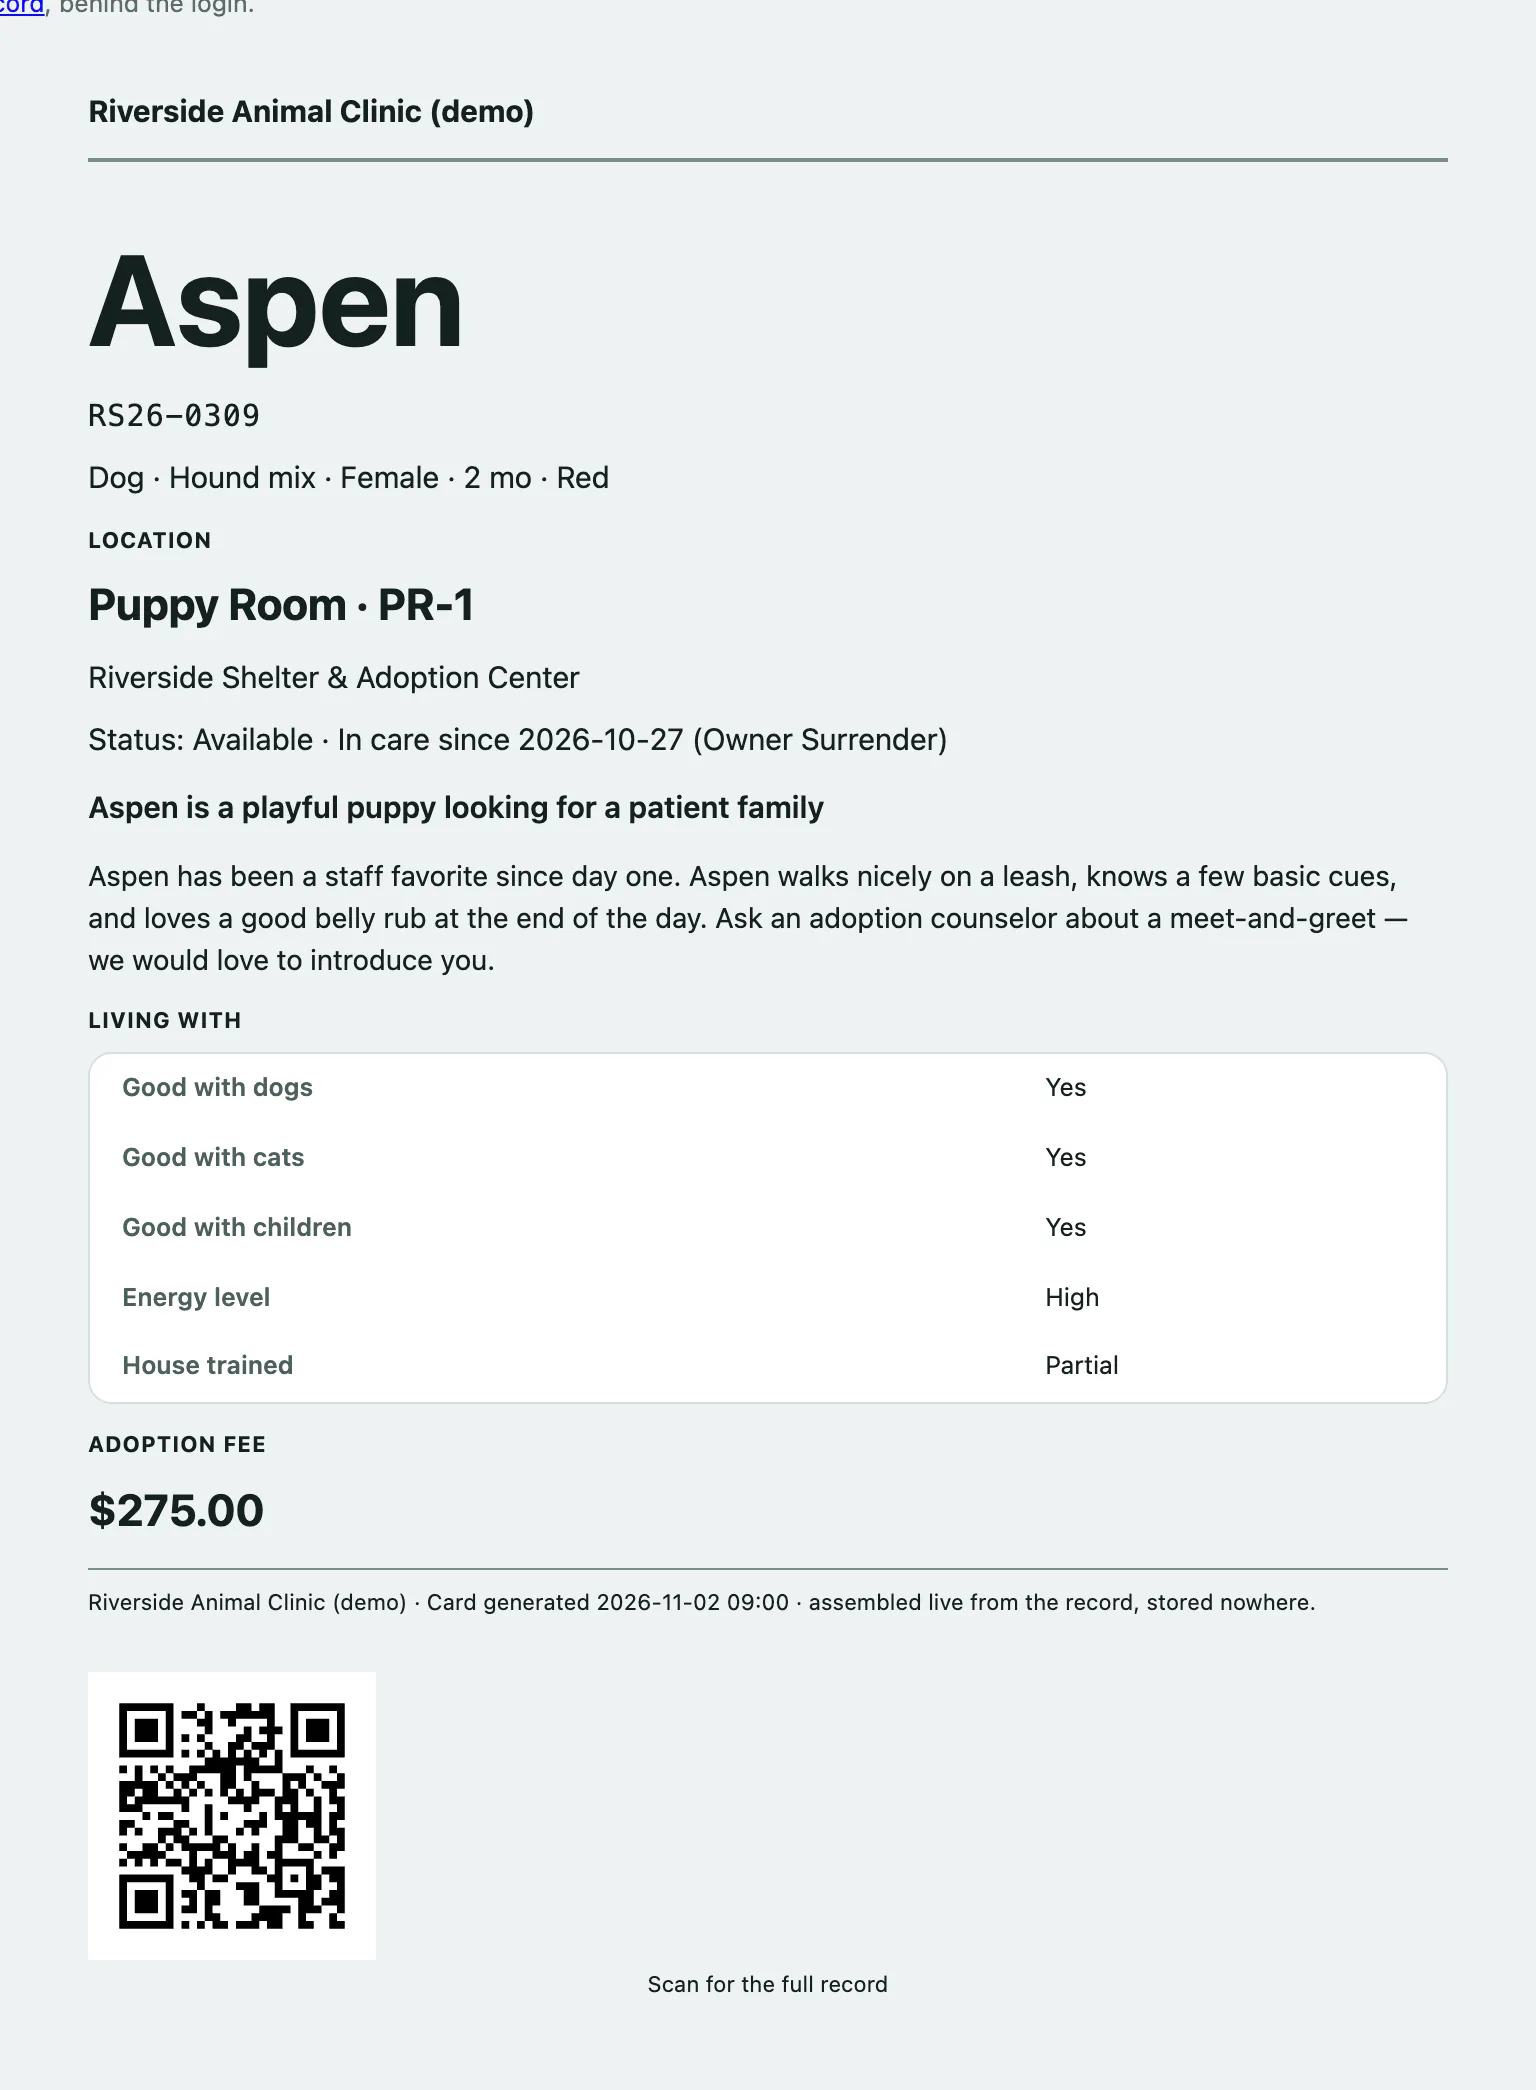
The card on screen is the size it prints at. It never shows the microchip number or anyone's contact details, because anyone walking past the kennel can read it. A caution flag is printed at every size.
Who can do this
Anyone signed in can view intakes and print kennel cards. Recording an intake, moving facilities and uploading attachments need intake permission, which front desk, veterinarians and practice managers have by default. The stray owner check needs outcome permission, which those same roles have by default.
When the animal leaves your care, record how: see Record an outcome.